
How to Export Revit to 3ds Max with Textures
Export a Revit 3D view or the whole model as OBJ with its materials, a folder of textures and bump maps set up for 3ds Max, and import it with the right settings. This guide follows the video on this page, recorded in Revit 2026 and 3ds Max with the free SnapSheets plugin.
Watch on YouTube · 1:53 min · Revit 2026 · Updated Nov 2026
Guide
Export Revit to 3ds Max, Step by Step
Six steps from the open Revit model to the textured model in 3ds Max.
Before you start
- Revit 2019–2027 with a 3D view of the model.
- 3ds Max. OBJ import is built in.
- The free SnapSheets plugin. Download SnapSheets and run the installer – no admin rights are needed.
- Open SnapSheets
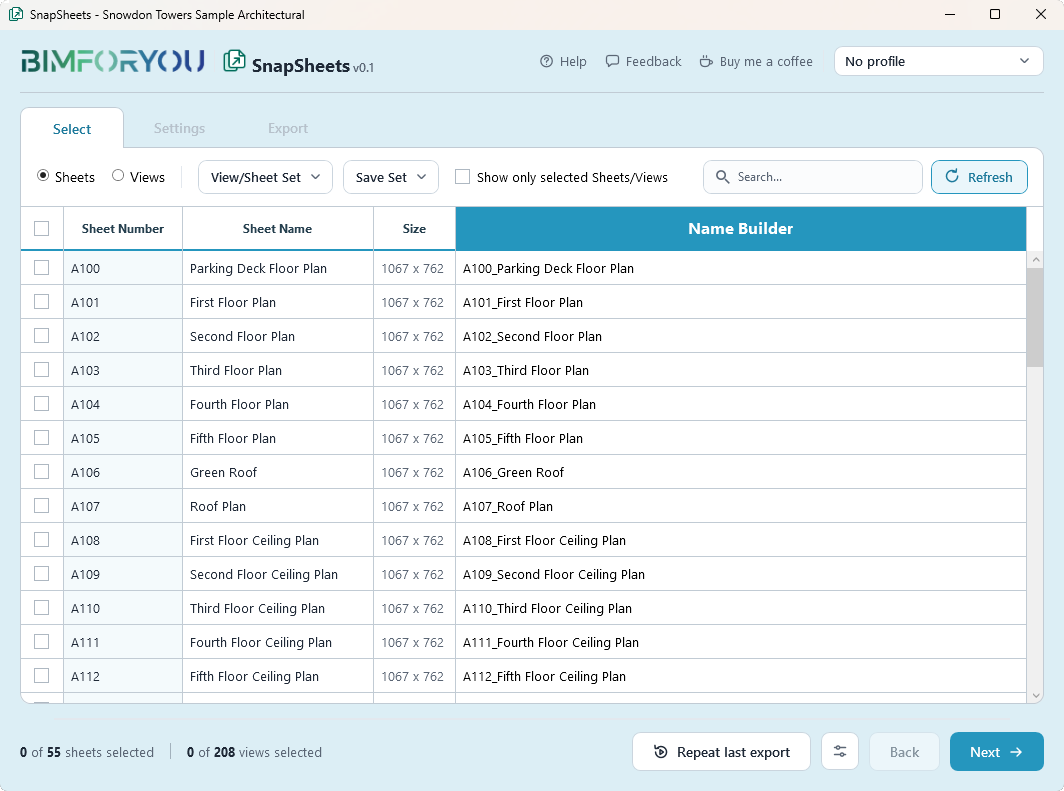
Start Revit, open your project and click SnapSheets on the Bimforyou tab (Export panel). The plugin opens in the Select step with a list of all sheets and views in the model.
- Select the 3D view
Switch the list to Views and tick the 3D view you want to export. With Active view SnapSheets exports what is visible in that view, so hide what you do not need first, for example with Visibility/Graphics (VV) or a section box.
- Build the file name
Open the Name Builder and compose the file name from Revit parameters, for example the project number and the view name.
- Choose 3D, OBJ and 3ds Max
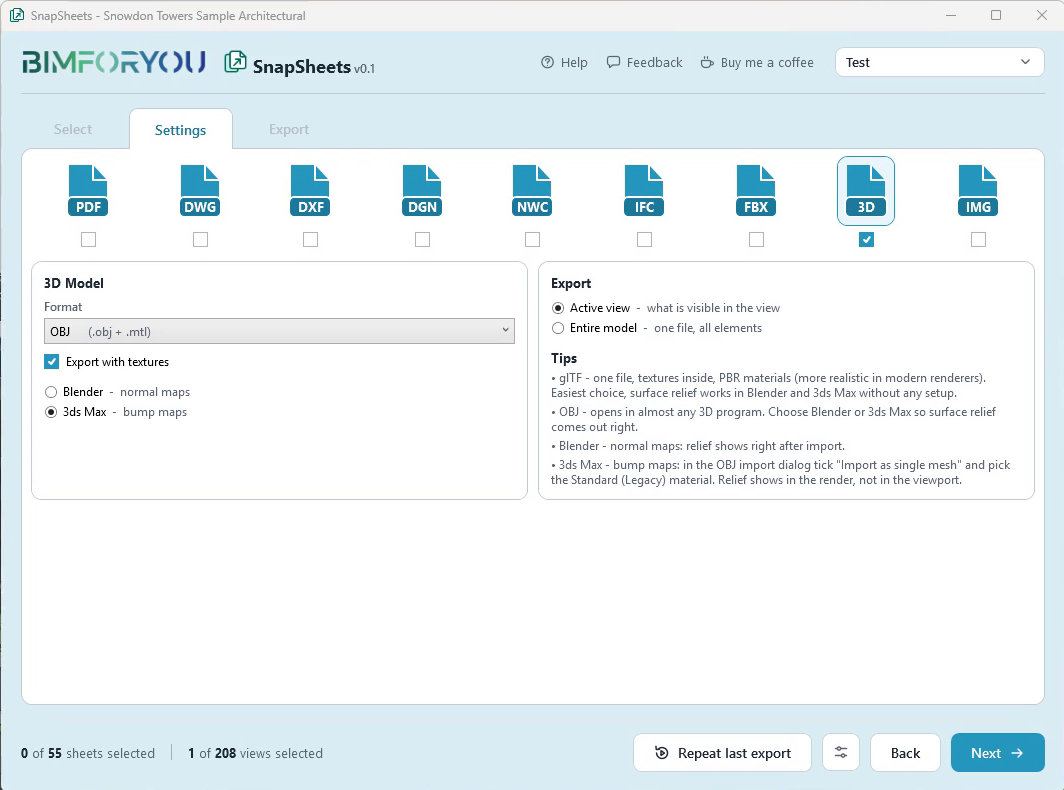
In Settings tick 3D, choose the format OBJ (.obj + .mtl), keep Export with textures ticked and choose 3ds Max – bump maps. Choose Active view or Entire model, which exports the whole model with its loaded linked models.
- Export the model
Pick the folder in the Export step and click Export. You get an .obj and an .mtl file with a folder of textures next to them. Keep them together.
- Import into 3ds Max
In 3ds Max choose File → Import and open the .obj. In the OBJ import options tick Import as single mesh, set the material to Standard (Legacy) and convert the units to Meters. Render with F9 to see the relief.
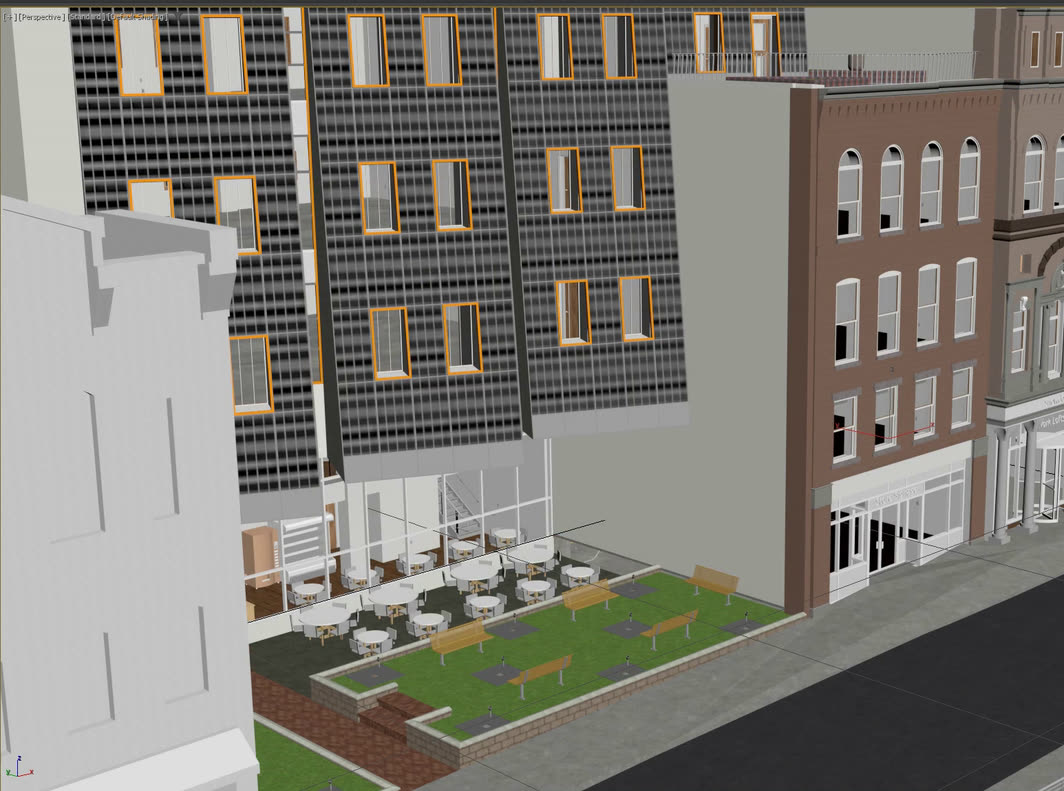
OBJ import settings in 3ds Max
- Import as single mesh – tick it. Without it a large Revit model falls apart into thousands of separate objects.
- Material: Standard (Legacy) – with Physical Material 3ds Max does not connect the bump maps.
- Units: convert to Meters – SnapSheets writes the model in metres, so it comes in at the right size.
- Relief in the render – the bump maps show when you render (F9), not in the viewport.
Why OBJ for 3ds Max
OBJ opens in 3ds Max without any plugin and keeps every texture as an ordinary image file in a folder, so you can edit or replace it. With 3ds Max – bump maps SnapSheets writes the surface relief the way the 3ds Max OBJ importer reads it. The same OBJ also opens in almost any other 3D program.
glTF in 3ds Max
glTF is the other 3D format in SnapSheets: one file with the textures inside. 3ds Max opens it with the free Khronos glTF plugin. Copy the plugin files for your 3ds Max version (2020–2027) into its Plugins folder and use File → Import. 3ds Max itself can export glTF, but not import it.
Other free ways, without installing anything into 3ds Max:
- OBJ straight away – choose OBJ with 3ds Max – bump maps in SnapSheets, as in this guide. It opens in 3ds Max without any plugin.
- Through Blender – open the .glb in the free Blender (File → Import → glTF 2.0) and save it as FBX with File → Export → FBX, with Path Mode set to Copy and the embed textures button on. 3ds Max opens the FBX directly.
Rendering the model in 3ds Max
Make a perspective viewport active and press F9. In the render window set Area to Render to View to render the whole viewport.
SnapSheets
What SnapSheets Adds
The tools around the 3D export that save time every time the model goes to 3ds Max.
FAQ
Questions and Answers
Can I export a Revit model to 3ds Max with textures?
Yes. SnapSheets exports a 3D view or the whole model as OBJ with its materials and a folder of textures, with bump maps set up for 3ds Max.
Why does my OBJ fall apart into thousands of objects in 3ds Max?
Tick Import as single mesh in the OBJ import options. Without it the 3ds Max OBJ importer splits a large model into separate objects.
Why do I not see the bump maps in 3ds Max?
The relief shows in the render (F9), not in the viewport. Also import the materials as Standard (Legacy); with Physical Material 3ds Max does not connect the bump maps.
Can I use glTF in 3ds Max instead of OBJ?
Yes, with the free Khronos glTF plugin for 3ds Max. glTF is one file with the textures inside.
Are linked models included?
Yes, with Entire model. It exports the whole model with its loaded linked models in one file. Active view exports what is visible in the selected 3D view.
Is SnapSheets free?
Yes, including for commercial work. There is no account, no licence key and no export limit.
More guides
More Revit Export Guides
How to Export Revit to Navisworks (NWC)
Export 3D views or the whole project to NWC for Navisworks.
Read guide →How to Export Revit 3D Views to FBX
One FBX file per 3D view, with level of detail options.
Read guide →How to Export Revit to Blender with Textures
One glTF file with the textures inside, ready for Blender.
Read guide →How to Export Revit Views and Sheets to Images
Set the pixel size and image quality for many sheets at once.
Read guide →Revit Export Formats: PDF, DWG and More at Once
Export the same sheets as PDF, DWG and DXF in one run.
Read guide →How to Export PDF from Revit: Many Sheets at Once
Combine sheets into one PDF or export a file per sheet.
Read guide →How to Export Revit to DWG (AutoCAD)
Use your DWG export setups and keep linked models as external references.
Read guide →How to Export Revit to IFC: Settings Explained
Choose the IFC version, the property sets and the level of detail.
Read guide →
SnapSheets: Free Revit Batch Export Plugin
All features, every export format and the free download in one place.
About SnapSheets →