
SnapSheets User Guide
This user guide explains everything SnapSheets can do, setting by setting: how to select sheets and views, build file names from Revit parameters and export PDF, DWG, IFC, NWC, FBX, 3D models and images in one run.
1Getting started
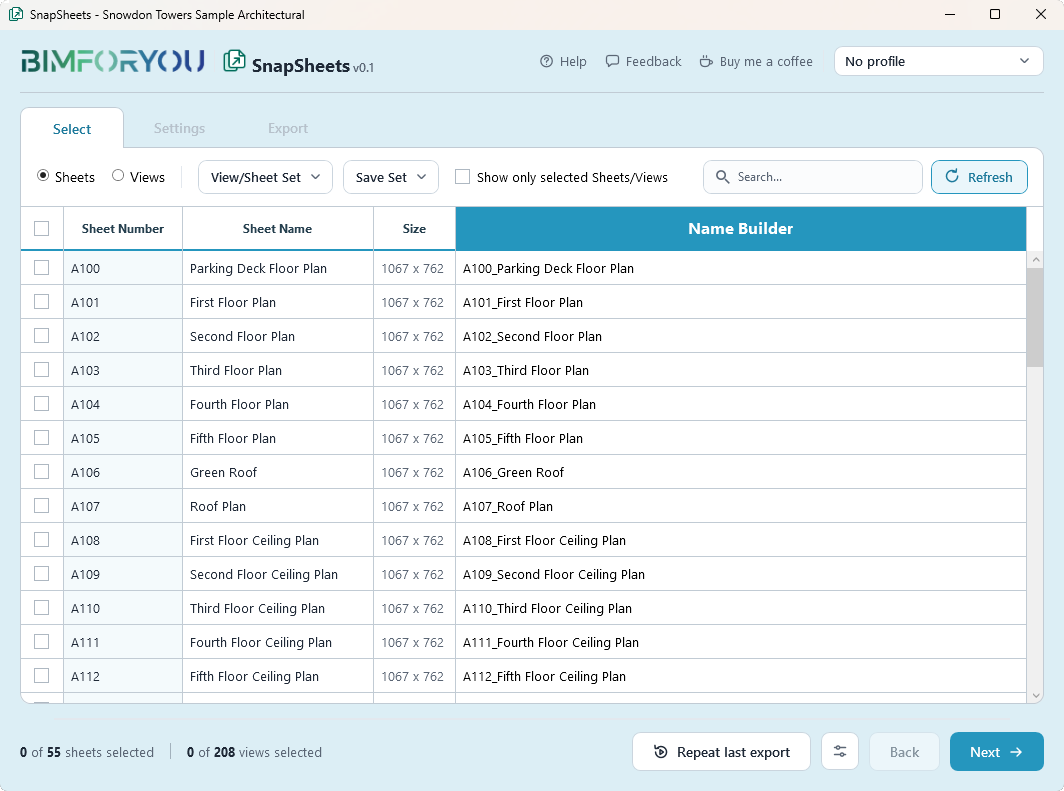
SnapSheets exports many Revit sheets, views and 3D models in one run, to every format you need, with file names built from your Revit parameters. You work in three steps, shown as tabs at the top of the window: Select, Settings and Export.
1.1Install and open
- InstallDownload the installer from the SnapSheets page, run it and choose your Revit versions (2019–2027). No admin rights are needed.
- First startWhen Revit asks about the new add-in, choose Always Load.
- Open SnapSheetsGo to the Bimforyou tab → Export panel → SnapSheets. You can move the button to the Add-Ins tab in Plugin settings.
1.2The window at a glance
- SelectChoose sheets and views and set how the files will be named.
- SettingsTick the formats and set the options for each of them.
- ExportChoose the folder and extras such as the WIP stamp, drawing list or ZIP, then export.
- Top barProfiles to save and load a whole setup, Help, Feedback and Buy me a coffee.
- Bottom barRepeat last export, Plugin settings, Back and Next.
2Select sheets and views
The Select tab, the first step in the plugin, lists everything in the model that can be exported. Tick the rows you want. Sheets and views can be exported together in one run.
2.1List and filters
- Sheets / ViewsSwitch between the list of sheets and the list of views.
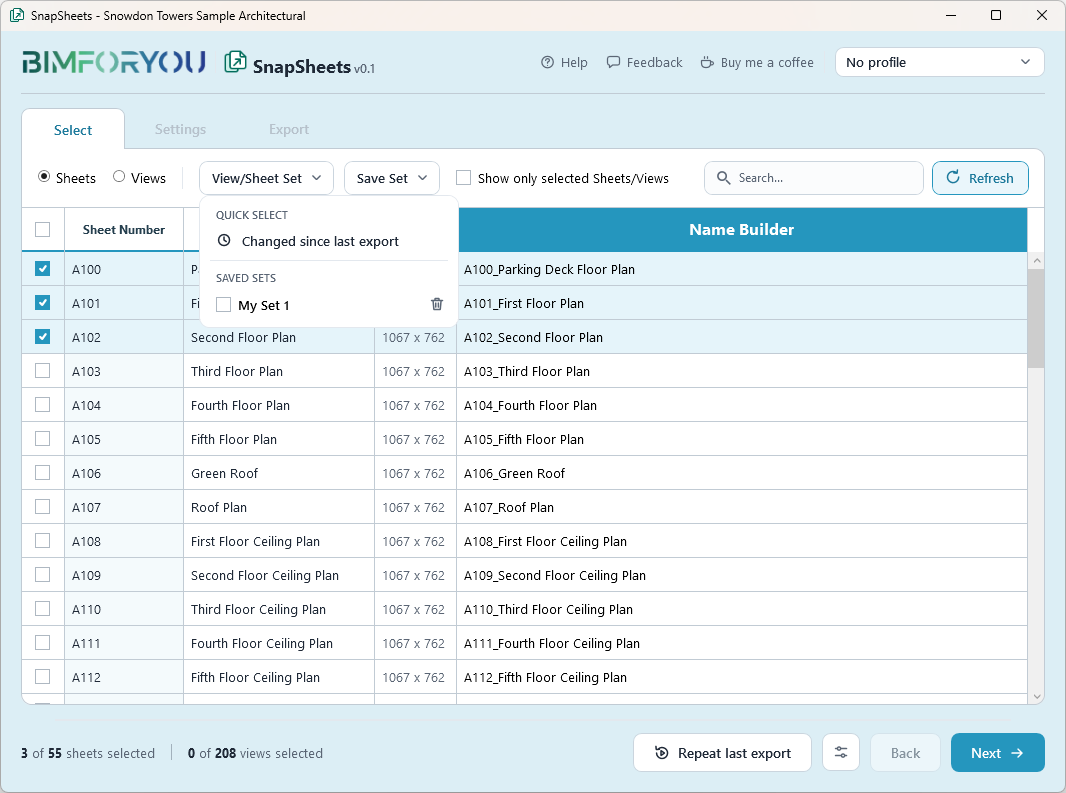
- View/Sheet SetLoad a View/Sheet Set from the model. Save Set saves the current selection as a new set.
- Show only selected Sheets/ViewsHides everything that is not ticked, so you can check the selection.
- SearchFilters the list by any text in the visible columns.
- Quick selectSelect only the sheets that changed since the last export, so you issue just the new revisions.
- RefreshReloads sheets, views and their parameters after you change the model.
- ColumnsSheets show number, name and size. Views show name, scale, detail level and discipline. Drag a column edge to resize it.
2.2Name Builder
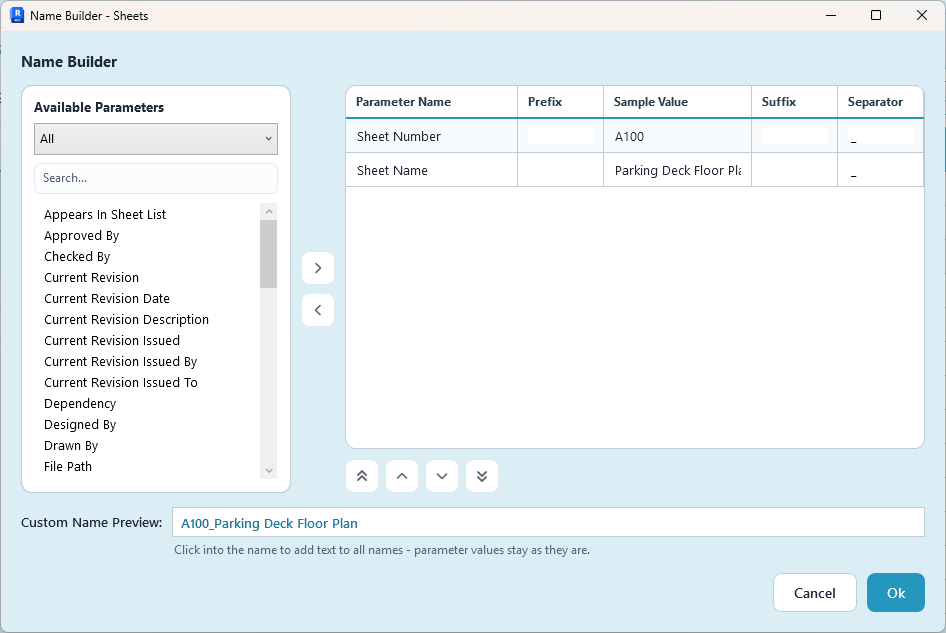
- What it doesBuilds the file name of every sheet or view from Revit parameters, for example
A101_Ground Floor Plan. Click a cell in the Name Builder column to open it. - Available ParametersPick parameters of the sheet or of Project Information, filter them with All, Project Information Parameters or Sheet Parameters, and search by name.
- Prefix, Suffix and SeparatorAdd fixed text before or after each parameter and choose the separator between them.
- OrderMove rows up or down to change the order of the parameters. The preview shows the result.
- Text at the start or endClick at the start or end of a name to add text to all names. The parameter values in the middle stay as they are.
- Multi-line valuesParameter values with several lines are joined into one line in the file name.
3Formats and their settings
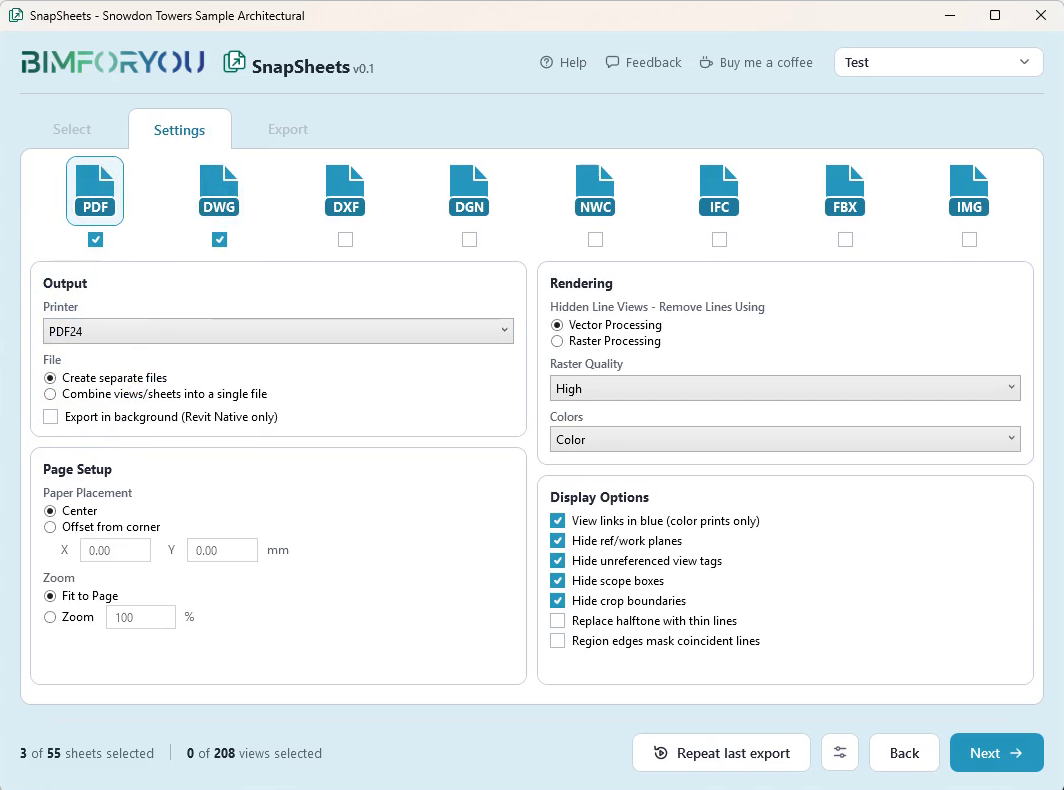
In the Settings tab, the second step, tick the formats you need. Click a format tile to see its options. Every format is exported with Revit’s own exporter, so the files look the same as a manual export.
3.1PDF
Revit 2022 and newer export PDF natively. In Revit 2019–2021 install a free PDF printer such as PDF24 and choose it as the printer.
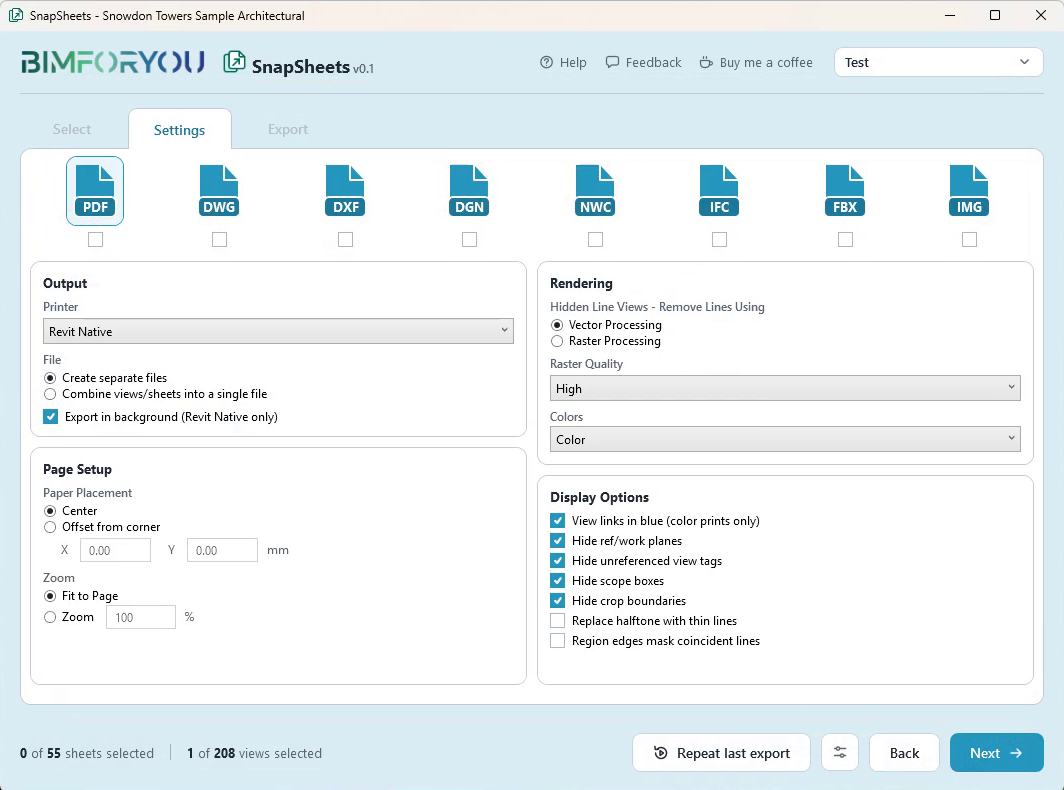
Output
- PrinterRevit Native (Revit 2022 and newer) or an installed PDF printer such as PDF24.
- FileCreate separate files for every sheet or view, or Combine views/sheets into a single file.
- Export in backgroundWith Revit Native, PDFs are created in the background, so you can keep working.
Page Setup
- Paper PlacementCenter or Offset from corner with X and Y in mm. Works with a fixed paper size, set in the Export step.
- ZoomFit to Page or a fixed percentage, for example 100 %.
Rendering and colours
- Raster QualityLow, Medium, High or Presentation.
- ColorsColor, Gray Scale or Black Line.
Display Options
- OptionsView links in blue, hide ref/work planes, hide unreferenced view tags, hide scope boxes, hide crop boundaries, replace halftone with thin lines and region edges mask coincident lines.
3.2DWG, DXF and DGN
CAD formats use the export setups saved in your Revit model, so layers, line weights and units are the same as in your standard export.
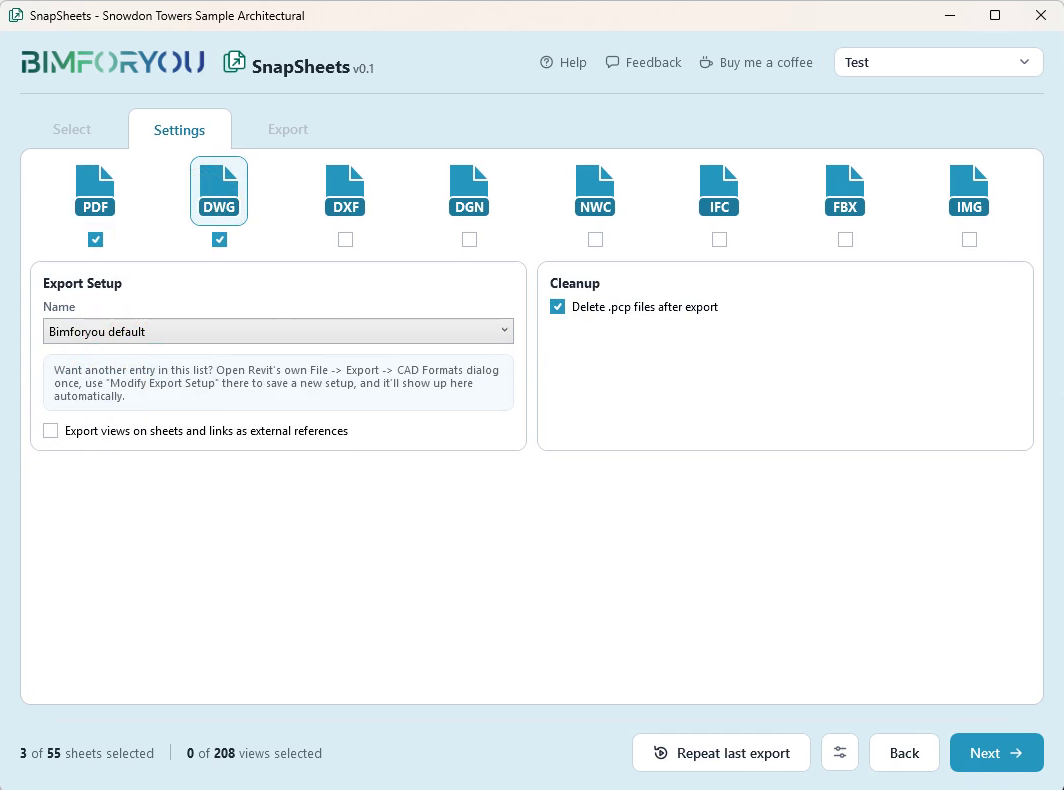
Settings
- Export SetupChoose one of the setups from the model. To add a new one, open Revit’s File → Export → CAD Formats, save it with Modify Export Setup, and it appears in SnapSheets automatically.
- DWG: views and links as external referencesExports the views placed on sheets and linked models as separate DWG files attached as xrefs.
- DWG: delete .pcp files after exportRemoves the plot configuration (.pcp) files that Revit creates next to the DWG files. On by default.
- DXFUses the same setups as DWG. Views on sheets and linked models are always included directly in the DXF file.
- DGNThe seed file, DGN version, levels and line styles come from the selected DGN setup.
3.3IFC
The IFC options match Revit’s own IFC exporter, grouped into four parts.
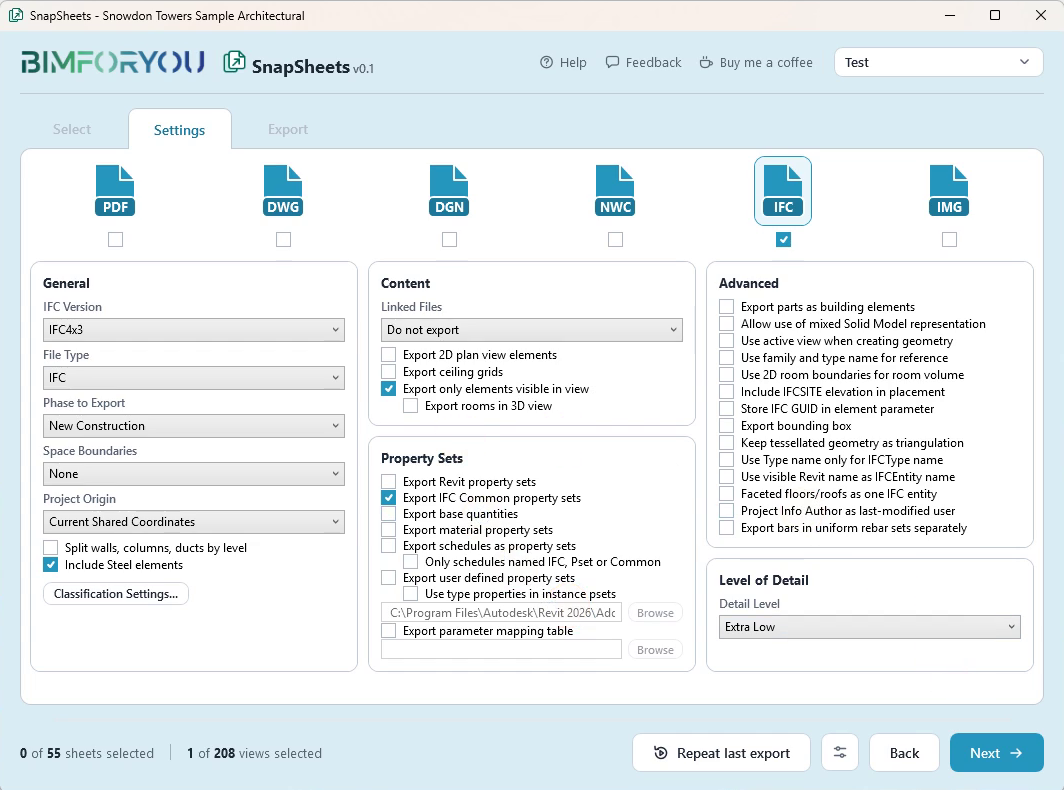
General
- IFC VersionIFC 2x3 Coordination View 2.0, IFC 2x3 Coordination View, IFC 2x2, IFC4 Reference View, IFC4 Design Transfer View, IFC 2x3 Basic FM Handover View, IFC 2x3 COBie 2.4 and IFC4x3.
- File TypeIFC, IFC XML, Zipped IFC or Zipped IFC XML.
- Phase to ExportThe phase whose elements are exported.
- Space BoundariesNone, 1st Level or 2nd Level.
- Project OriginCurrent Shared Coordinates, Site Survey Point, Project Base Point, Internal Coordinates, or a point oriented in True North.
- OtherSplit walls, columns and ducts by level, include steel elements, and Classification Settings.
Content
- Linked FilesDon’t export, export as separate IFCs, or export in the same IfcProject or IfcSite.
- OptionsExport 2D plan view elements, ceiling grids, only elements visible in the view, and rooms in 3D views.
Property Sets
- OptionsRevit property sets, IFC common property sets, base quantities, material property sets, schedules as property sets, user-defined property sets and a parameter mapping table.
Advanced and Level of Detail
- AdvancedExport parts as building elements, mixed solid model representation, active view geometry, family and type names for reference, 2D room boundaries, IfcSite elevation, IFC GUID stored in a parameter, bounding box and more.
- Level of DetailFrom Extra Low to High for tessellated geometry.
3.4Navisworks NWC
NWC is exported from the selected 3D view, with the options of Revit’s Navisworks exporter.
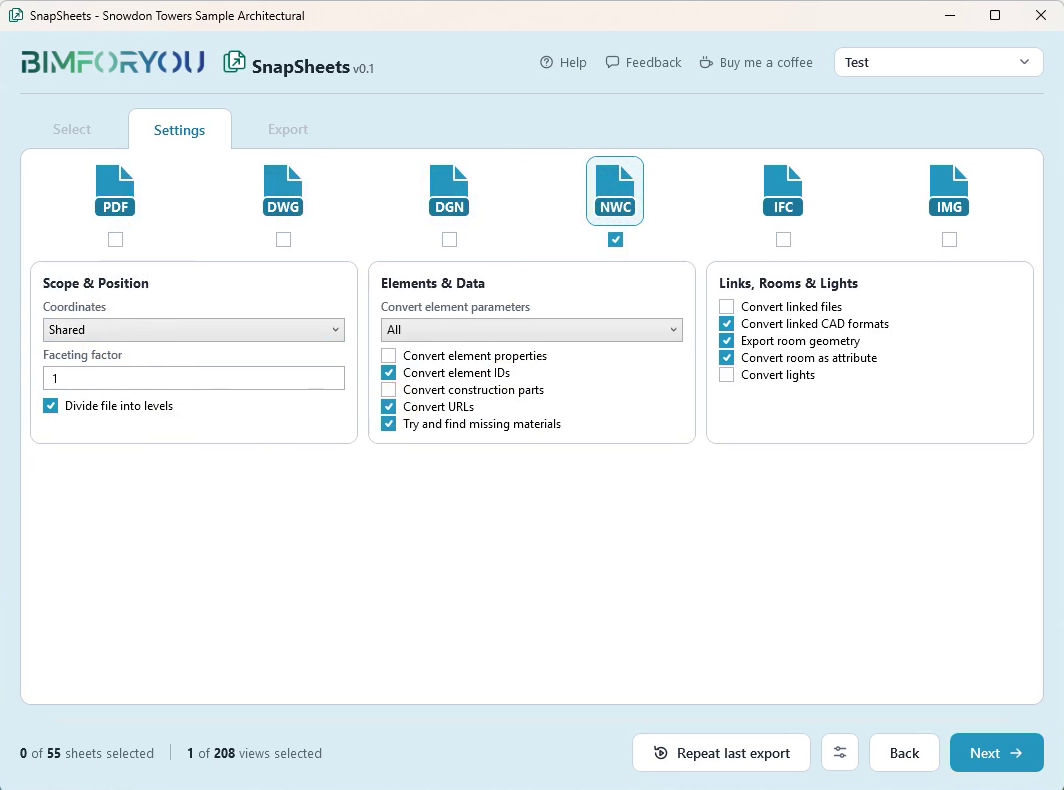
Settings
- Scope & PositionEach selected 3D view or the Entire project. Coordinates: Shared or Project internal.
- GeometryFaceting factor and dividing the file into levels.
- Elements & DataConvert element parameters, properties, IDs, construction parts and URLs, and try to find missing materials.
- Links, Rooms & LightsConvert linked files and linked CAD formats, export room geometry, rooms as attributes and lights.
3.5FBX
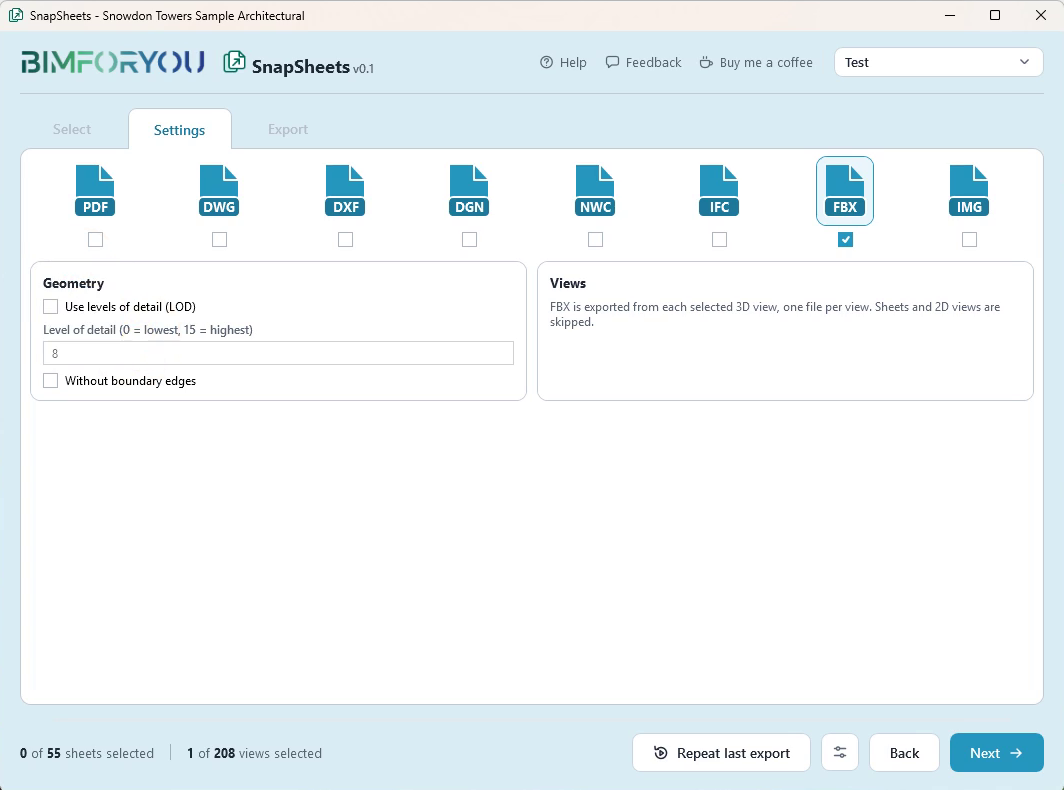
One FBX file is exported from every selected 3D view. Sheets and 2D views are skipped.
Settings
- Use levels of detail (LOD)Simplifies curved geometry, from 0 (lowest) to 15 (highest). The file is smaller and opens faster in visualisation software.
- Without boundary edgesLeaves out the edge lines of faces, so only surfaces are exported.
3.63D model with textures (glTF and OBJ)
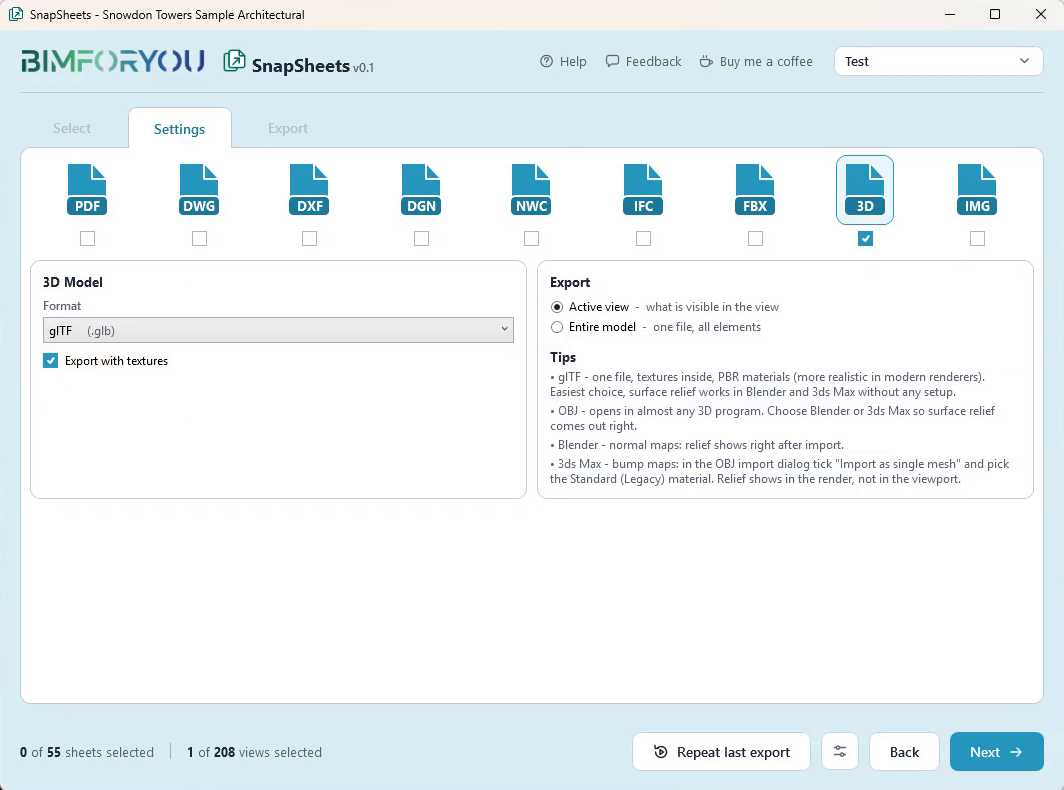
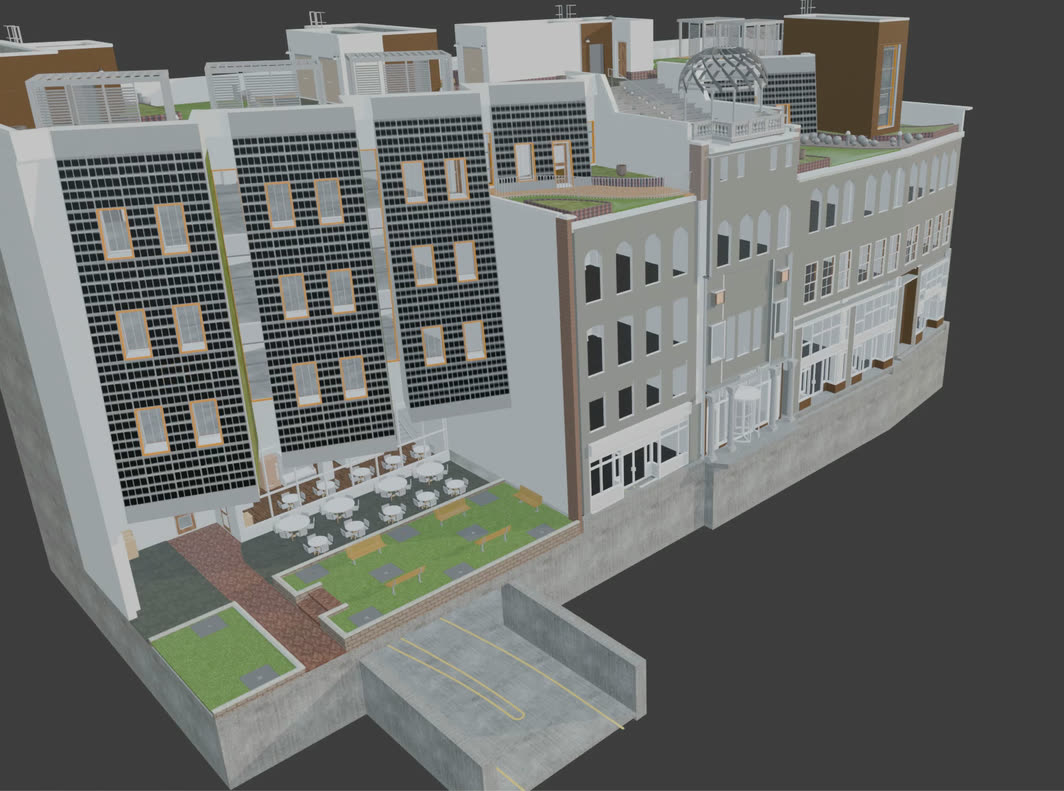
Exports the model with materials and textures for Blender, 3ds Max and most 3D programs. Units are metres with the Y axis up.
Settings
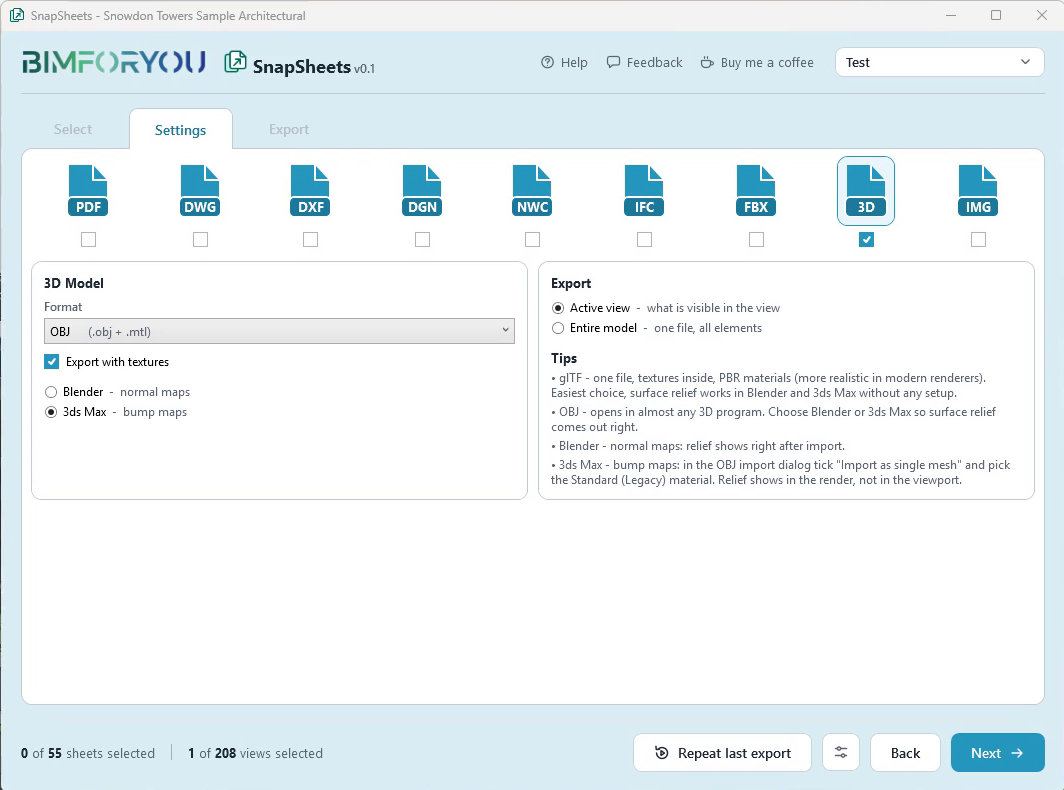
- FormatglTF (.glb): one file with textures inside and PBR materials, the easiest choice. OBJ (.obj + .mtl): opens in almost every 3D program, with textures in a folder next to the model.
- Export with texturesCopies or embeds colour, scale, rotation, tint, transparency and relief of the materials.
- Blender or 3ds Max (OBJ)Blender converts relief to normal maps. 3ds Max keeps bump maps, as Max’s OBJ import expects.
- ExportActive view: one model per selected 3D view, only what is visible. Entire model: one file with all elements, including loaded links.
Tips
- BlenderFile → Import → glTF or Wavefront (.obj). No settings needed. See Revit to Blender.
- 3ds MaxIn the OBJ import dialog tick Import as single mesh and choose the Standard (Legacy) material. glTF needs the free Khronos glTF plugin. See Revit to 3ds Max.
3.7Images
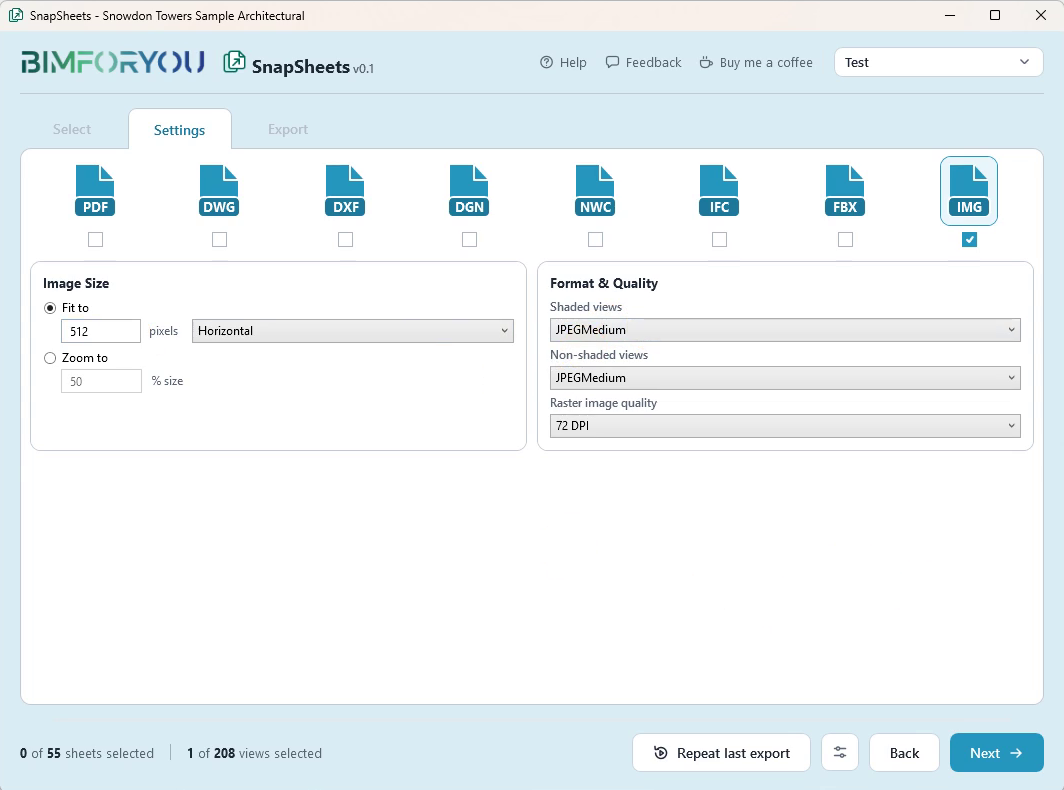
Exports sheets and views as PNG or JPG images.
Settings
- Image SizeFit to a number of pixels, horizontally or vertically, or Zoom to a percentage of the size.
- Format & QualityFile format for shaded and non-shaded views, and raster image quality from 72 to 600 DPI.
4Export
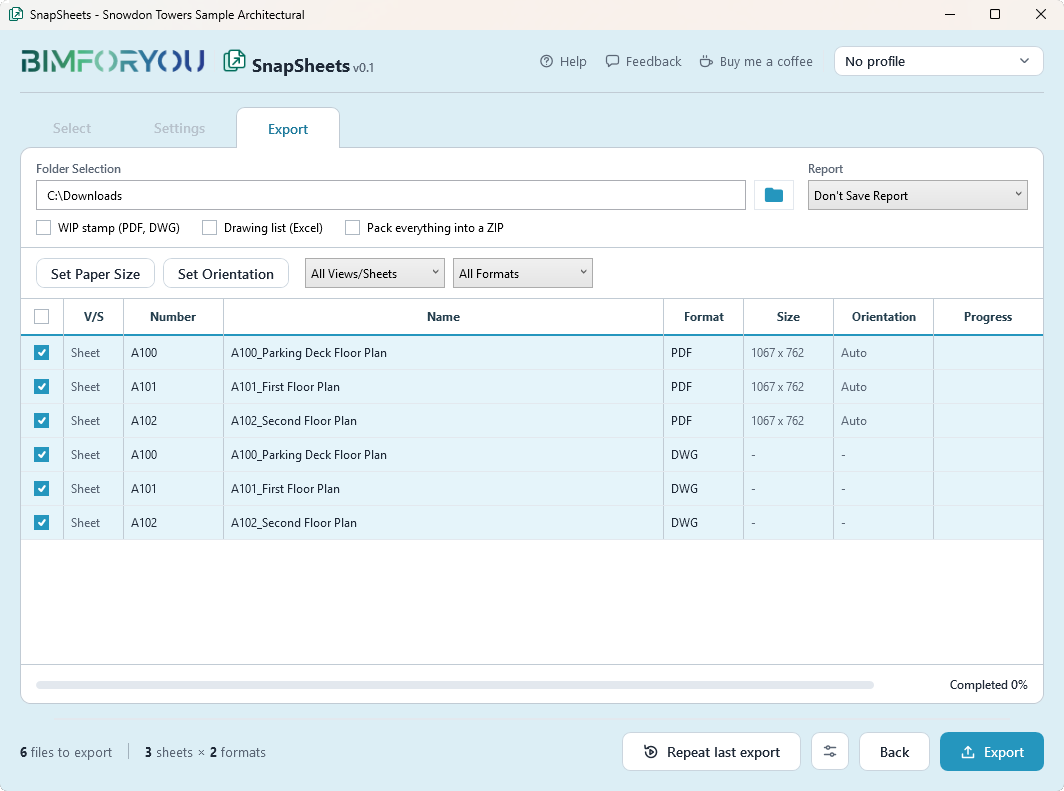
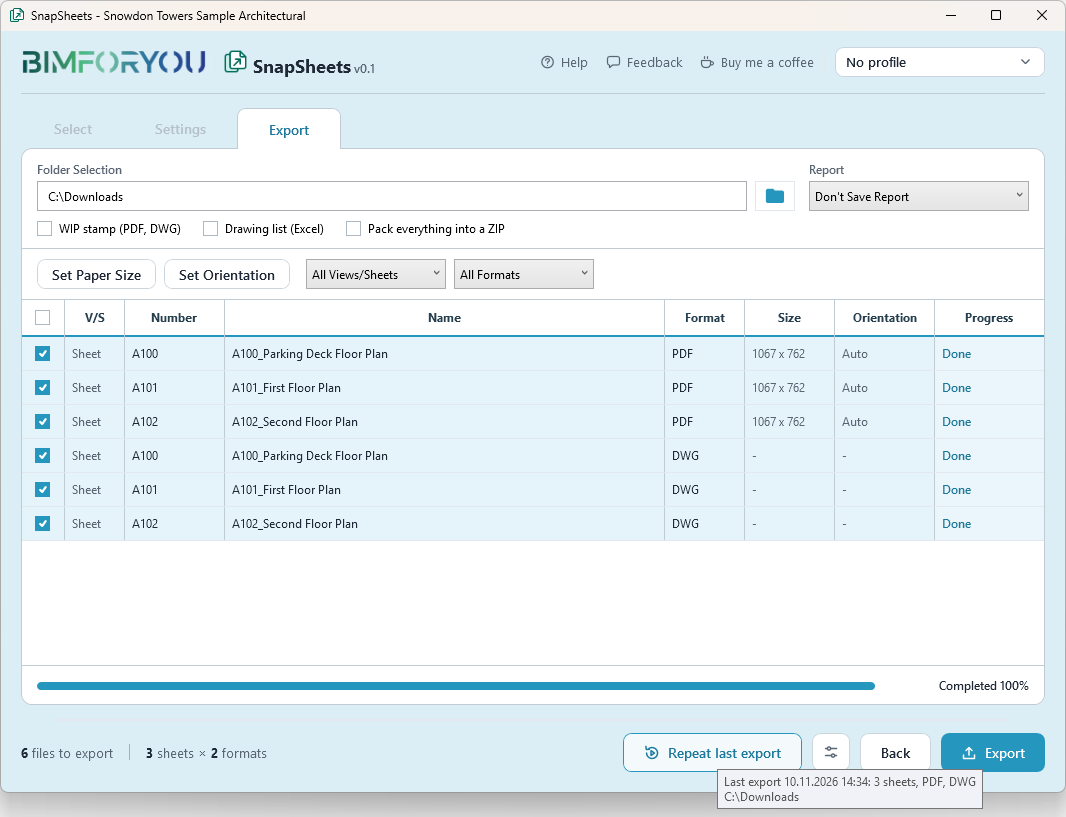
The Export tab, the last step, shows every file that will be created. Check the names, choose the folder and click Export.
4.1Before export
- Folder SelectionChoose the folder for all exported files.
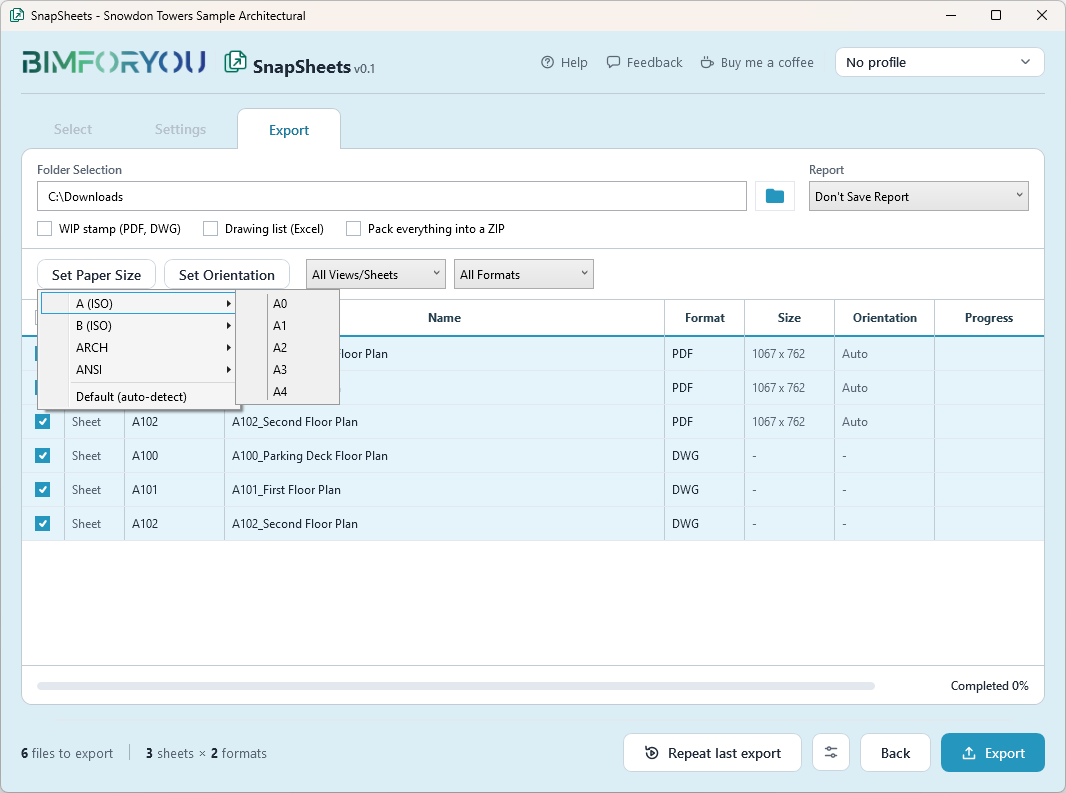
- Paper size detectionSnapSheets reads the real sheet size from the title block and maps it to ISO, ARCH or ANSI.
- Set Paper SizeOverride the size for all or selected rows with ISO A or B, ARCH or ANSI sizes, or keep Default (auto-detect).
- Set OrientationLandscape, Portrait or Auto.
- FiltersShow all rows or only sheets or views, and all formats or just one, so long lists are easier to check.
- Name of one fileAdd text at the start or end of a single file name, only for that file.
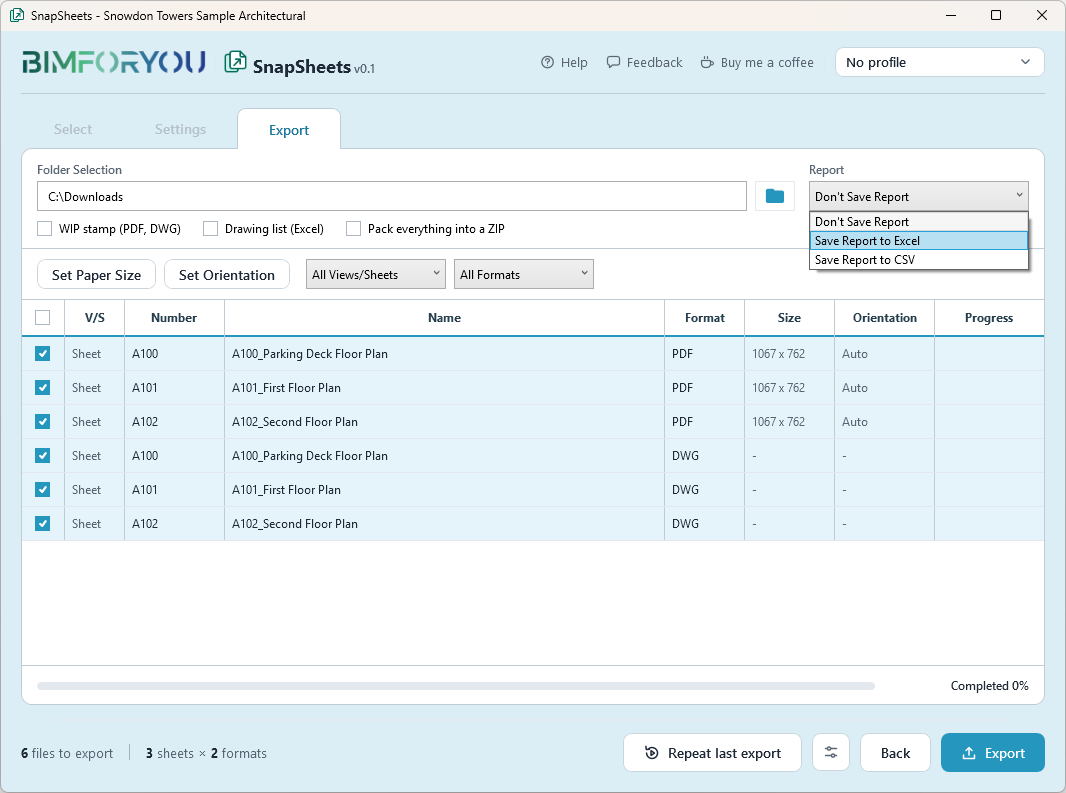
- ReportDon’t save a report, or save it to Excel or CSV.
4.2Extras
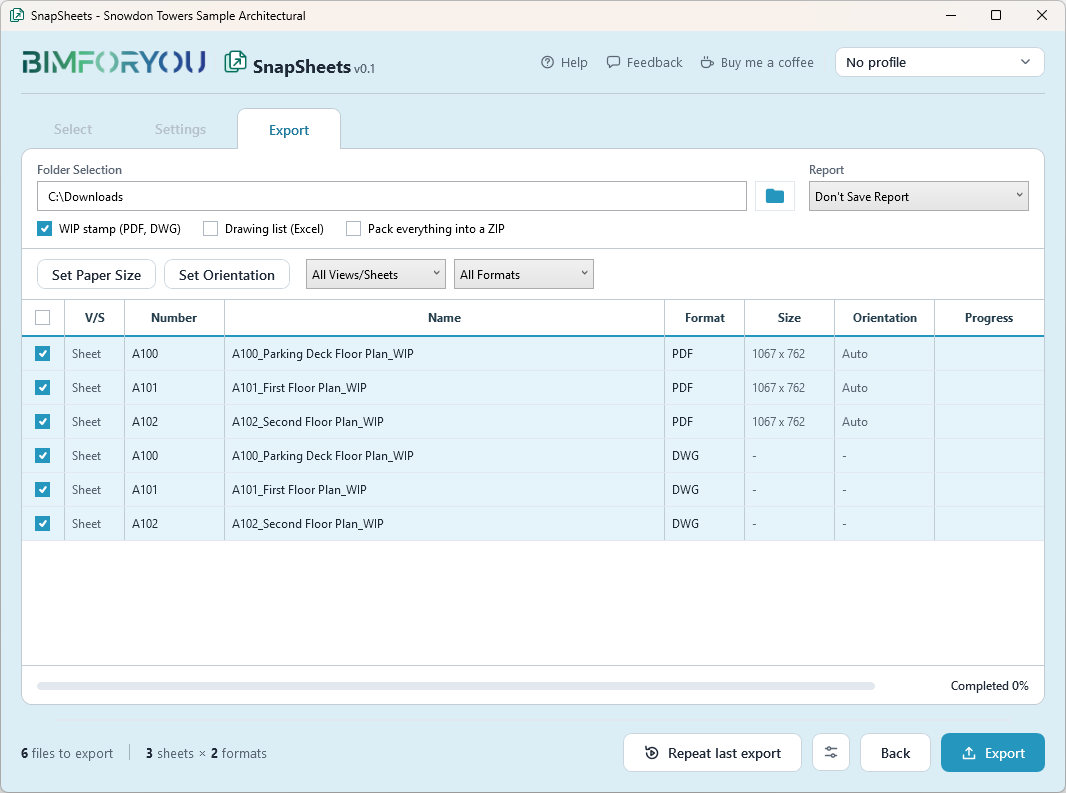
- WIP stamp (PDF, DWG)Adds a large red WIP with the export date and time over the title block and adds _WIP to the file names. The stamp is removed from the model right after export.
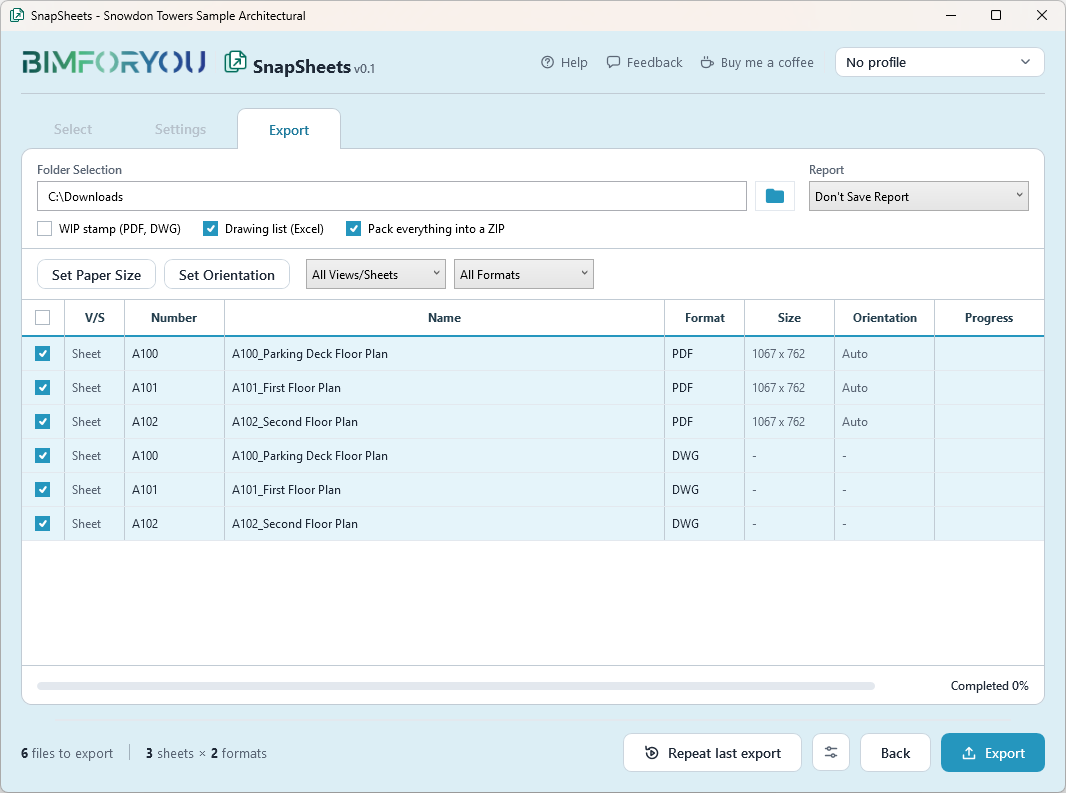
- Drawing list (Excel)Saves a list of the exported sheets and views with number, name, size and formats, with a header from Project Information or your own text.
- Pack everything into a ZIPPuts all files from this export, and the drawing list, into one ZIP in the output folder.
4.3During and after export
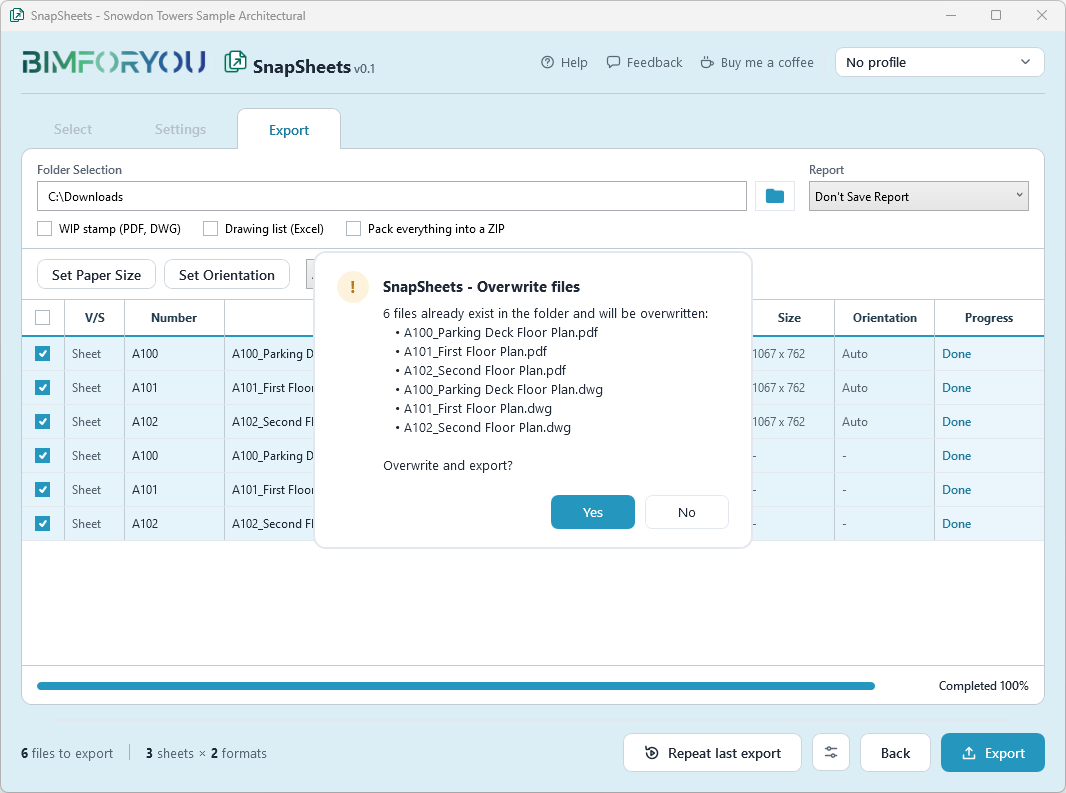
- Export checkBefore exporting, SnapSheets warns about files that already exist, files open in another program, duplicate names and paths that are too long.
- ProgressShows how far the export is. When it finishes, Open Folder opens the output folder.
5Profiles and Repeat last export
Save time on exports you repeat before every issue.
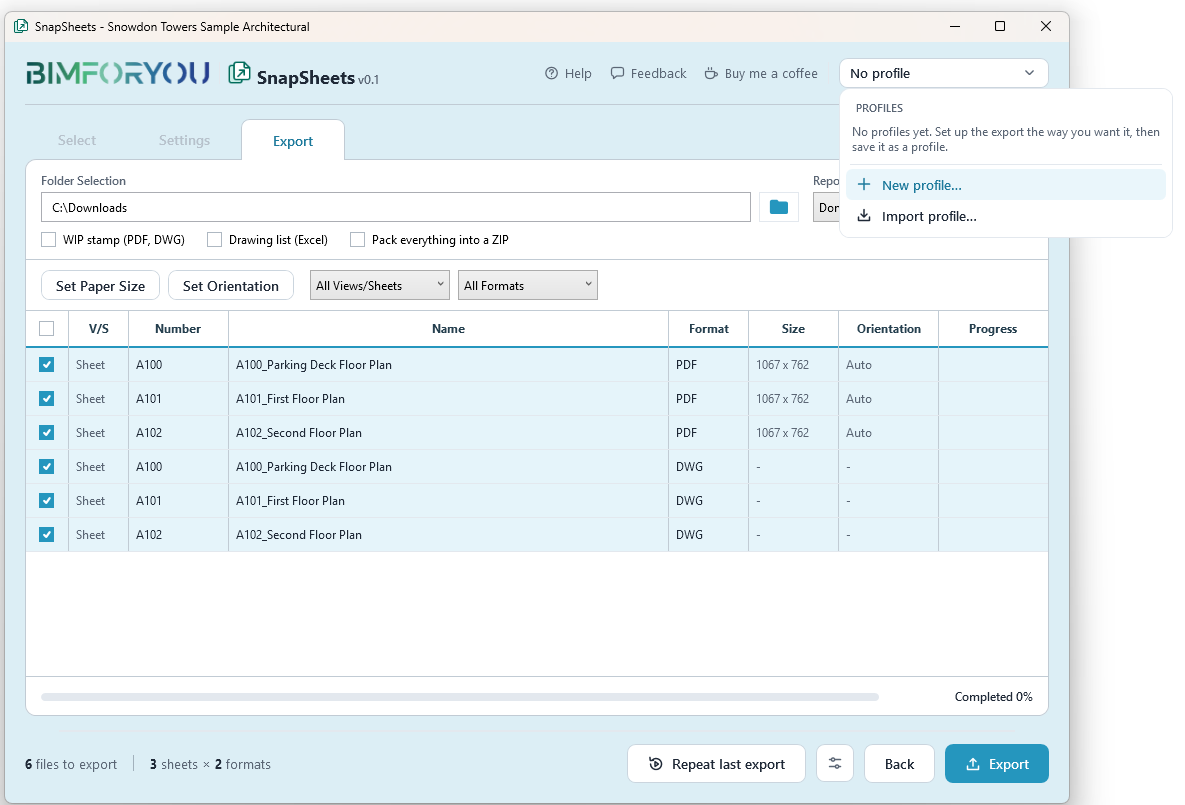
- 5.1ProfilesSave the whole setup under a name, including formats, settings and Name Builder, and load it again with one click from the top bar.
- 5.3Repeat last exportRuns the last export again with the same selection and settings.
- 5.4Opening SnapSheetsThe plugin opens with default values, or with the active profile. The last state is loaded only through Repeat last export.
6Plugin settings
Open Plugin settings at the bottom of the window. Changes are saved right away and apply to all projects.
- 6.1Ignore temporary view modesTurns off Temporary Hide/Isolate, Reveal Hidden Elements, Reveal Constraints and Worksharing Display during export, so drawings look the way they normally do. They can be turned back on after export.
- 6.2Drawing list and ZIP nameFrom Project Information (project name and issue date) or your own text.
- 6.4DefaultsReset this page or Reset whole plugin. Profiles and View/Sheet Sets are kept.
7Help, updates and feedback
The Help button at the top of the window opens these options.
- 7.1HelpOpens this user guide and the video guides.
- 7.2Check for updatesChecks if a newer version is available. See the changelog for what is new.
- 7.3Need a custom plugin?Describe what you want to automate in Revit and we will get back to you.
- 7.4AboutShows your SnapSheets version and our contact.
- 7.5FeedbackSend a message, idea or bug report directly from the plugin. You can add technical details to help us fix a problem.
8Troubleshooting
Quick answers to the most common problems.
- 8.1“Windows protected your PC”The installer is new and not code-signed yet. Click More info → Run anyway.
- 8.2No PDF in Revit 2019–2021These versions have no native PDF export. Install a free PDF printer such as PDF24 and choose it as the printer.
- 8.3My DWG setup is missingCreate or save it in Revit under File → Export → CAD Formats, then click Refresh.
- 8.4A file can’t be overwrittenClose it in the other program, for example a PDF viewer or AutoCAD, and export again.
- 8.5Path too longChoose a shorter output folder or shorten the file names in the Name Builder.
- 8.6OBJ falls apart in 3ds MaxTick Import as single mesh in the OBJ import dialog.
- 8.7UninstallOpen Windows Settings → Apps → Installed apps, find SnapSheets and choose Uninstall.
9Video guides
Short step-by-step videos for each format.
Still stuck?
Ask Us Directly
Use Feedback in the plugin or send us a message, and we will help you.